Hooking into Sitecore WFFM Validation Rules Using JavaScript
Introduction
When it comes to validating a form on a website, we need to think about its application in multiple places. It's favoured to have form validation on both the client and the server as to enforce data integrity and security. It's likely that the validation rules applied in the frontend will differ to those applied in the backend. Reasons for this could be:
- The frontend/backend developers will apply their own rules.
- The frontend/backend make use of a 3rd party library with its own rules.
- Native validation support provided with DOM elements.
We want to satisfy uniformity in our apps to keep code clean and easily maintainable - so we need to get creative when it comes to form validation. It's possible to tap into the form validation - which Sitecore's WFFM module exposes - via some creative JavaScript code.
Setup
For this tutorial, I'll be using Sitecore 8.2 rev. 171121 with an installation of Web Forms For Marketers 8.2 Update-6. Go ahead and setup your local development site with these prerequisites.
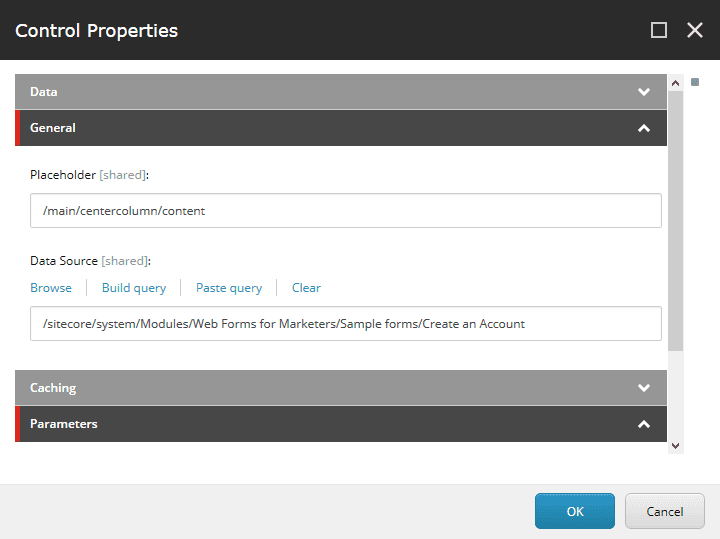
We now need to configure a form on a page for us to noodle around with. Go to the
home item in Sitecore (/sitecore/content/Home) and add a Form Sublayout
to the page with the DataSource set to
/sitecore/system/Modules/Web Forms for Marketers/Sample forms/Create an Account,
the Presentation Details should look similar to the below image. Publish the Home
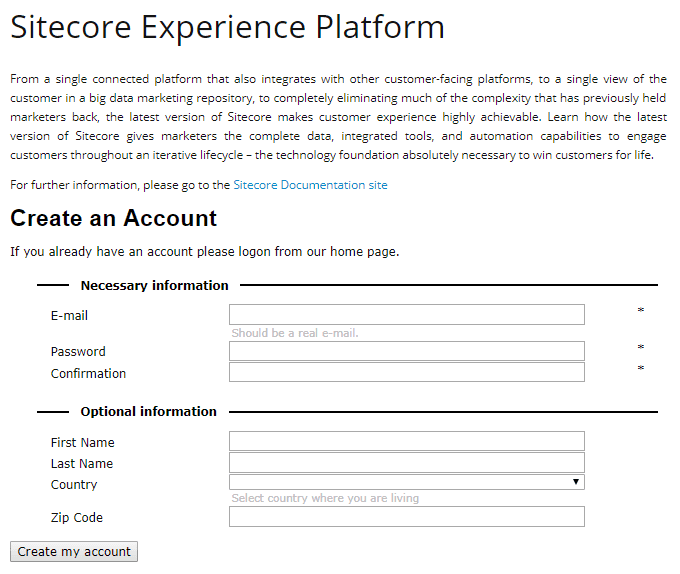
item and check the frontend to verify that the form has been added to the page.


The Approach
Now that we have the form on the page, we can now get stuck in with some JavaScript.
Right-click the Email input field and click on Inspect Element. You will be
directed to the below HTML in dev tools.
<div class="scfEmailGeneralPanel">
    <input name="main_0$centercolumn_0$form_0E8906B399BA421EA74D277ED17A32FD$field_4FB90F035B614A54A1B8275D7C698726" type="text" id="main_0_centercolumn_0_form_0E8906B399BA421EA74D277ED17A32FD_field_4FB90F035B614A54A1B8275D7C698726" class="scfEmailTextBox">
    <span class="scfEmailUsefulInfo">Should be a real e-mail.</span>
    <span
        data-val-controltovalidate="main_0_centercolumn_0_form_0E8906B399BA421EA74D277ED17A32FD_field_4FB90F035B614A54A1B8275D7C698726" data-val-errormessage="E-mail contains an invalid address."
        data-val-display="Dynamic"
        data-val-validationgroup="form_0E8906B399BA421EA74D277ED17A32FD_submit" id="main_0_centercolumn_0_form_0E8906B399BA421EA74D277ED17A32FD_field_4FB90F035B614A54A1B8275D7C6987265D10AF7533054C39908EB25E8CB4ABDC_validator" class="scfValidator trackevent.%7b844BBD40-91F6-42CE-8823-5EA4D089ECA2%7d fieldid.%7b4FB90F03-5B61-4A54-A1B8-275D7C698726%7d inner.1"
        data-val="true"
        data-val-evaluationfunction="RegularExpressionValidatorEvaluateIsValid"
        data-val-validationexpression="^[A-Za-z0-9\.\_%+-]+@[A-Za-z0-9.-]+\.[A-Za-z]{2,4}$"
        style="display:none;">
            Enter a valid email address.
    </span>
</div>
That's quite a barrage on the eyes. Those attribute values are generated in the backend so we don't need to worry about where they come from. We're more concerned with a handful of the attributes on those elements which we can access using JS. There are three elements within the panel:
- The input field itself.
- Information Message (if any).
- The element containing the validation rules/messages.
These elements can be accessed via JavaScript Window variables. To test this, ensure that the input element is highlighted in the Elements pane, open the JavaScript console and type:
window[$0.id].Validators[0]Note: The variable $0 is a DOM reference shorthand in Google Chrome which allows the developer to quickly reference DOM elements in the console. For more information, visit this page.
This line is doing the following:
window[$0.id]: Returns the node elementwindow[$0.id].Validators: Returns an array of all the validators currently assigned to the node elementwindow[$0.id].Validators[0]: We access the first (in this case, the only) validator bound to this element.
If you compare the element returned in Point 3 with the last <span />
in the first code snippet in this section, you will notice that they are both the same.
So now we're starting to piece together a path of how these elements are linked.
Now let's add a dot (.) to the end of the line that we've typed in the console to see what else we can access (by looking through the autocomplete menu):
| Accessor | Result |
|---|---|
| validationexpression | ^[A-Za-z0-9.\_%+-]+@[A-Za-z0-9.-]+.[A-Za-z]{2,4}$ |
| controltovalidate | main_0_centercolumn_0_form_0E8906B399BA421EA74D277ED17A32FD_field_4FB90F035B614A54A1B8275D7C698726 |
| errormessage | E-mail contains an invalid address. |
| validationGroup | form_0E8906B399BA421EA74D277ED17A32FD_submit |
We are therefore able to access the Regular Expression and the error message defined for this field (in Sitecore) in the frontend.
Let's go to the email field's respective Sitecore item to confirm this.
This item can be found in the following location at
/sitecore/system/Modules/Web Forms for Marketers/Sample forms/Create an Account/Necessary information/E-mail.
This item references a Simple Field setting in the following location
sitecore/system/Modules/Web Forms for Marketers/Settings/Field Types/Simple Types/E-mail -
let's navigate to that item. You will now be able to see the Regular Expression
defined in this field and compare it to that in the table above to see that they
both match.
The Code
So let's write some JavaScript to validate the email field on blur. Paste and run the following in the console:
var emailField = document.getElementsByClassName("scfEmailTextBox")[0]
emailField.addEventListener("blur", function() {
  // If we call the function with this method, we are able to access the input
  // through the `this` keyword.
  var hasPassedValidation = sitecoreValidation.call(this)

  // Run some other business logic (if needed).

  // Incorporate `hasPassedValidation` with any other business logic to
  // determine the field's ultimate validation.-
})

var sitecoreValidation = function() {
  // Create an array which we will push the validation results onto.
  // The items will either be `true` or `false`.
  var validityTable = []

  // Find all validators next to the email input field.
  var sitecoreValidationEls = this.parentElement.getElementsByClassName(
    "scfValidator"
  )

  // Cast the sitecoreValidationEls HTMLCollection to an Array (to be iterable).
  var validationArr = [].slice.call(sitecoreValidationEls)

  if (validationArr.length) {
    validationArr.forEach(function(validationEl) {
      // Get the element's respective JavaScript reference on the window.
      var valItem = window[validationEl.id]

      if (valItem && valItem.validationexpression) {
        // Pass the validation expression into a RegExp object.
        var valExpression = new RegExp(valItem.validationexpression, "g")

        // Run the input field's value against the regular expression.
        var isValid = this.value.match(valExpression) != null

        validityTable.push(isValid)
      }
    }, this)
  }

  // If the array doesn't contain any falsey values, then the element has
  // passed validation, so return `true`.
  return validityTable.indexOf(false) < 0
}
We're doing a couple of things here:
- For the sake of this example, we're just targeting the email field directly as opposed to targeting all input elements in a generic way (which will be the preferred way, in reality).
- On input blur, the function
sitecoreValidationwill be invoked with thethiskeyword assigned to the input field itself. - We then do a bit of DOM traversal to access any sibling elements with the
CSS class name
.scfValidatorand cast them to the arrayvalidationArr(to be iterated). - Using the
validationArrelements array, we run some queries on the window to see if any validation expressions are assigned to that element. If there are any validation expressions available to us, we then: 1. Initialise a RegExp object, passing the expression into the constructor. 2. We run the current input fields' value against the RegExp object created above. 3. We push the result into thevalidationArrarray. - After all validations have been queried, we then check if there are any falsey values in the array and consequently return the result to the invoker.
- We can then run additional business logic, such as custom UI updates or query a service which can be combined with the input's final validation result.
Conclusion
Using this method, we are able to centralise rules and messages in one place for easier development and maintenance as there is one single point of truth.
Comments